Night Vision AK
Night vision is more available and affordable than ever before thanks to advancements in night vision technology and the interest from the 2A community. As new units are introduced, older units become more affordable for the average person.
The ability to shoot in complete darkness is an experience shared by a small percentage of shooters, however this number is growing. Along with this, is the interest to optimize firearms to shoot using a Night Optical Device (NOD). AR-15s are inherently easier to optimize to be compatible with NODs as they’re typically, from the factory, able to mount optics, lights, and lasers. The AKM, and its variants, are another story.
Most AKs do not come with the ability to mount modern optics and accessories such as infrared (IR) lasers and illuminators. Although NODs allow you to see and shoot in near absolute darkness, they still require a small amount of ambient light to work well. In some environments, such as inside of a dark structure or a moonless night, IR lasers and illuminators are crucial for the operation of NODs.
In order to optimize the AK for nightvision use, we’ll be required to make some modern upgrades that will allow us to attach the parts we need.
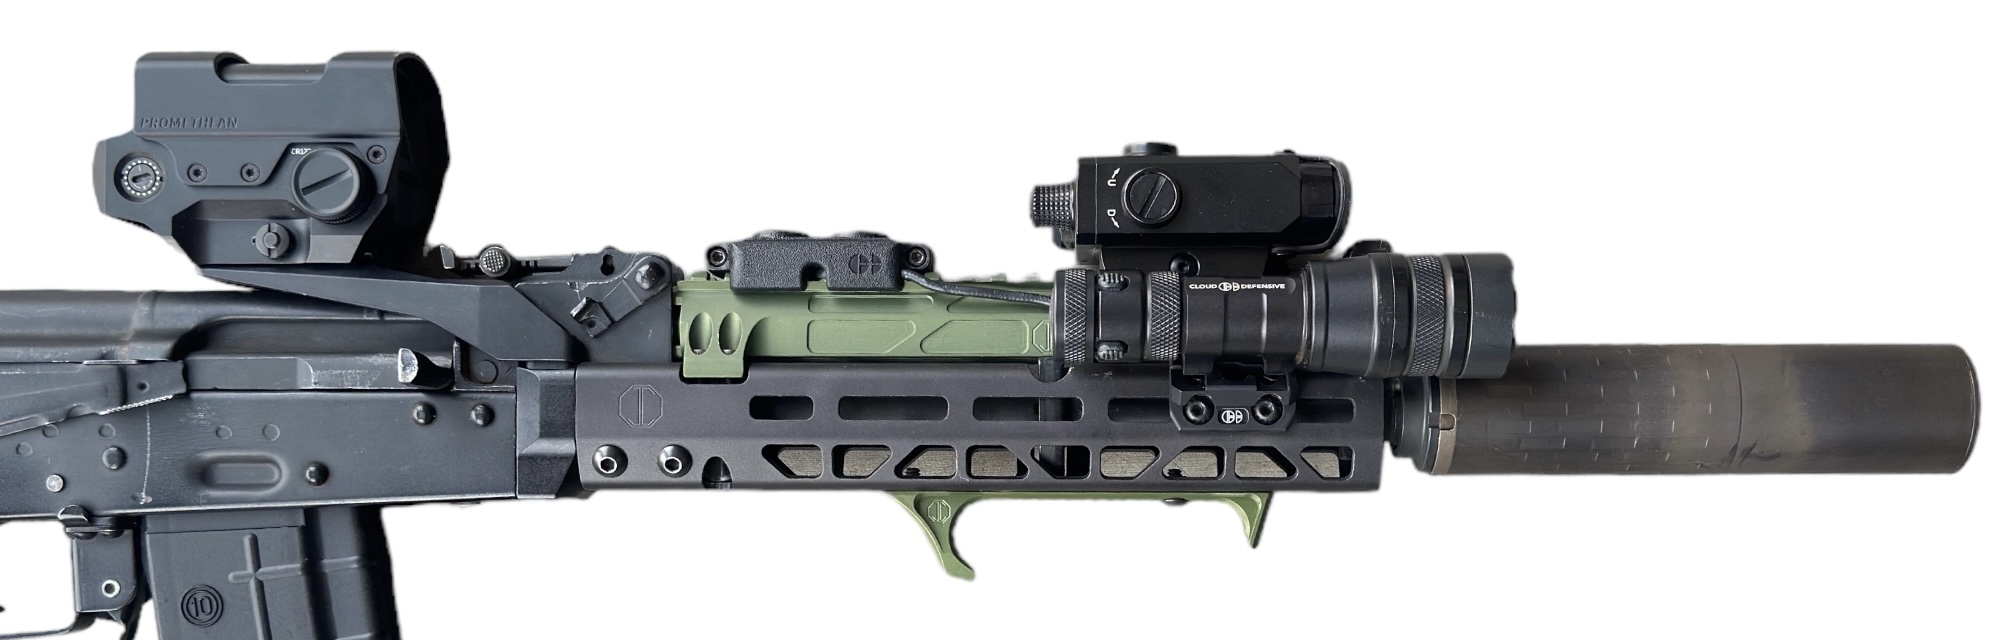
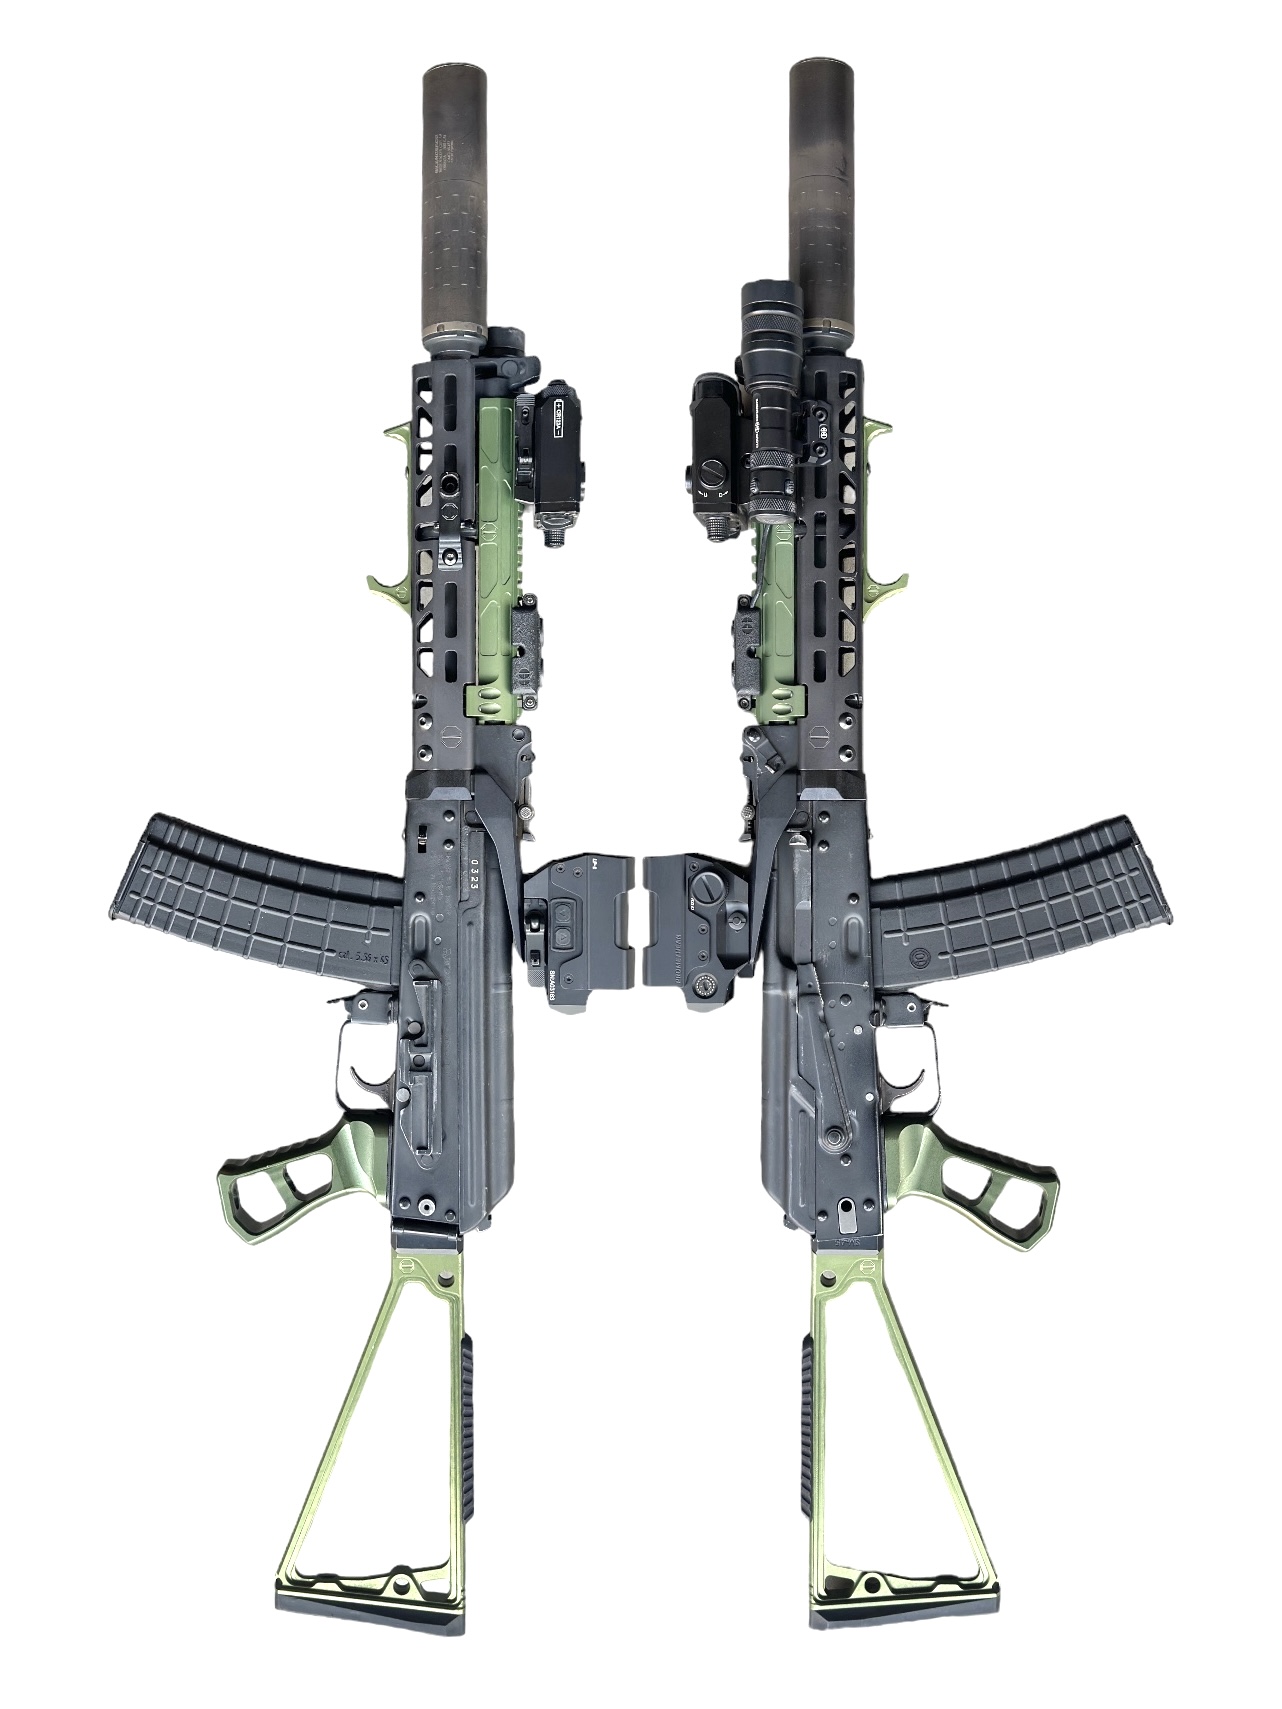
The JMAC MMS is the perfect option to optimize the AK for nightvision use. The MMS is a free-float, modular system, that allows you to configure it the way you want for your particular AK variant. In most cases, no permanent modification is required and the MMS can be installed in minutes. Once installed, the MMS will allow you to mount an optic using the MMS Optic Mount as well as lights and lasers on the handguard and railed gas tube.
When shooting under NODs, there’s a couple ways to effectively aim and shoot your firearm. Passive aiming is when you’re aiming through a nightvision compatible optic and seeing the reticle through your NODs. This technique is preferred by some as it uses the red dot already installed on the firearm, and doesn’t require an IR laser to be purchased. Another advantage of passive aiming is that it has a very low light signature when compared to other options. The down side to passive aiming is that the ability to see your target is diminished due to the optic, especially when using a single tube nightvision device. In order to comfortably use a red dot for passive aiming, it has to be mounted tall enough so that it can align with your NODs. Therefore, low-profile optics mounted directly to the gas tube or a co-witness mount, may not work well with NODs.
The other aiming option is referred to as active aiming, where you’re using a device such as an IR laser to aim your firearm. Active aiming is a great option as it allows you to aim your firearm without having to look through an optic. This typically allows you to engage targets at further distances as you will be able to see more clearly. There are also downsides to active aiming. Some shooters will find active aiming to be cost prohibitive as IR laser units can cost anywhere from $500 to $5000. Many commercial IR units can be had for $1500 or less. Another downside is that IR lasers put off a very obvious light signature that anyone with NODs could see, including those you don’t want to see you. Finally, IR lasers have to be zeroed independently from your red dot and depending on the unit, you may need to use special IR reflective targets.

Whether you’re using passive or active aiming techniques, an IR illuminator is a crucial tool to have at the ready. A firearm safety rule we’re all familiar with is “know your target and what’s beyond it”. This also applies to shooting in the dark. In environments where little to no ambient light exists, an IR illuminator will be required to identify targets whether you’re using active or passive aiming techniques. IR illumators can be added as standalone units, or can be integrated into your IR laser unit. Either way, for serious use, make sure you have one.
On my night vision optimized AK, I want the ability to choose between aiming passively and actively as some situations may require one or the other. The MMS Railed Gas Tube makes it very easy for me to mount my IR laser/illuminator unit. Something to consider is the height of the IR laser unit. In order to ensure my view is not obstructed when looking through my red dot (both in daylight and low-light situations) I have to make sure my optic is mounted tall enough to see over the IR laser unit.
The MMS 1913 Optic Mount works great for this setup as it allows me to mount an optic with a taller riser. The optic I’m using has a 1/3rd co-witness riser integrated into the base which puts the center of the optic approximately 1.6” above the 1913 rail it’s attached to. This allows me to easily see over the IR laser unit without my vision being obstructed. If you’re not comfortable with an optic being mounted in such a way, a cheek riser could be used on the stock to compensate.
Even though this AK is optimized for night vision use, it still needs to be have the ability to use white light. White light refers to your standard weapon mounted flashlight which would be used in low-light situations where night vision would not be appropriate. Some examples of this could be, dusk/dawn where there’s too much ambient light, inside structures where white light is present, and when working around other who don’t have night vision capabilities. In some cases, you may find yourself quickly switching between white light and IR.
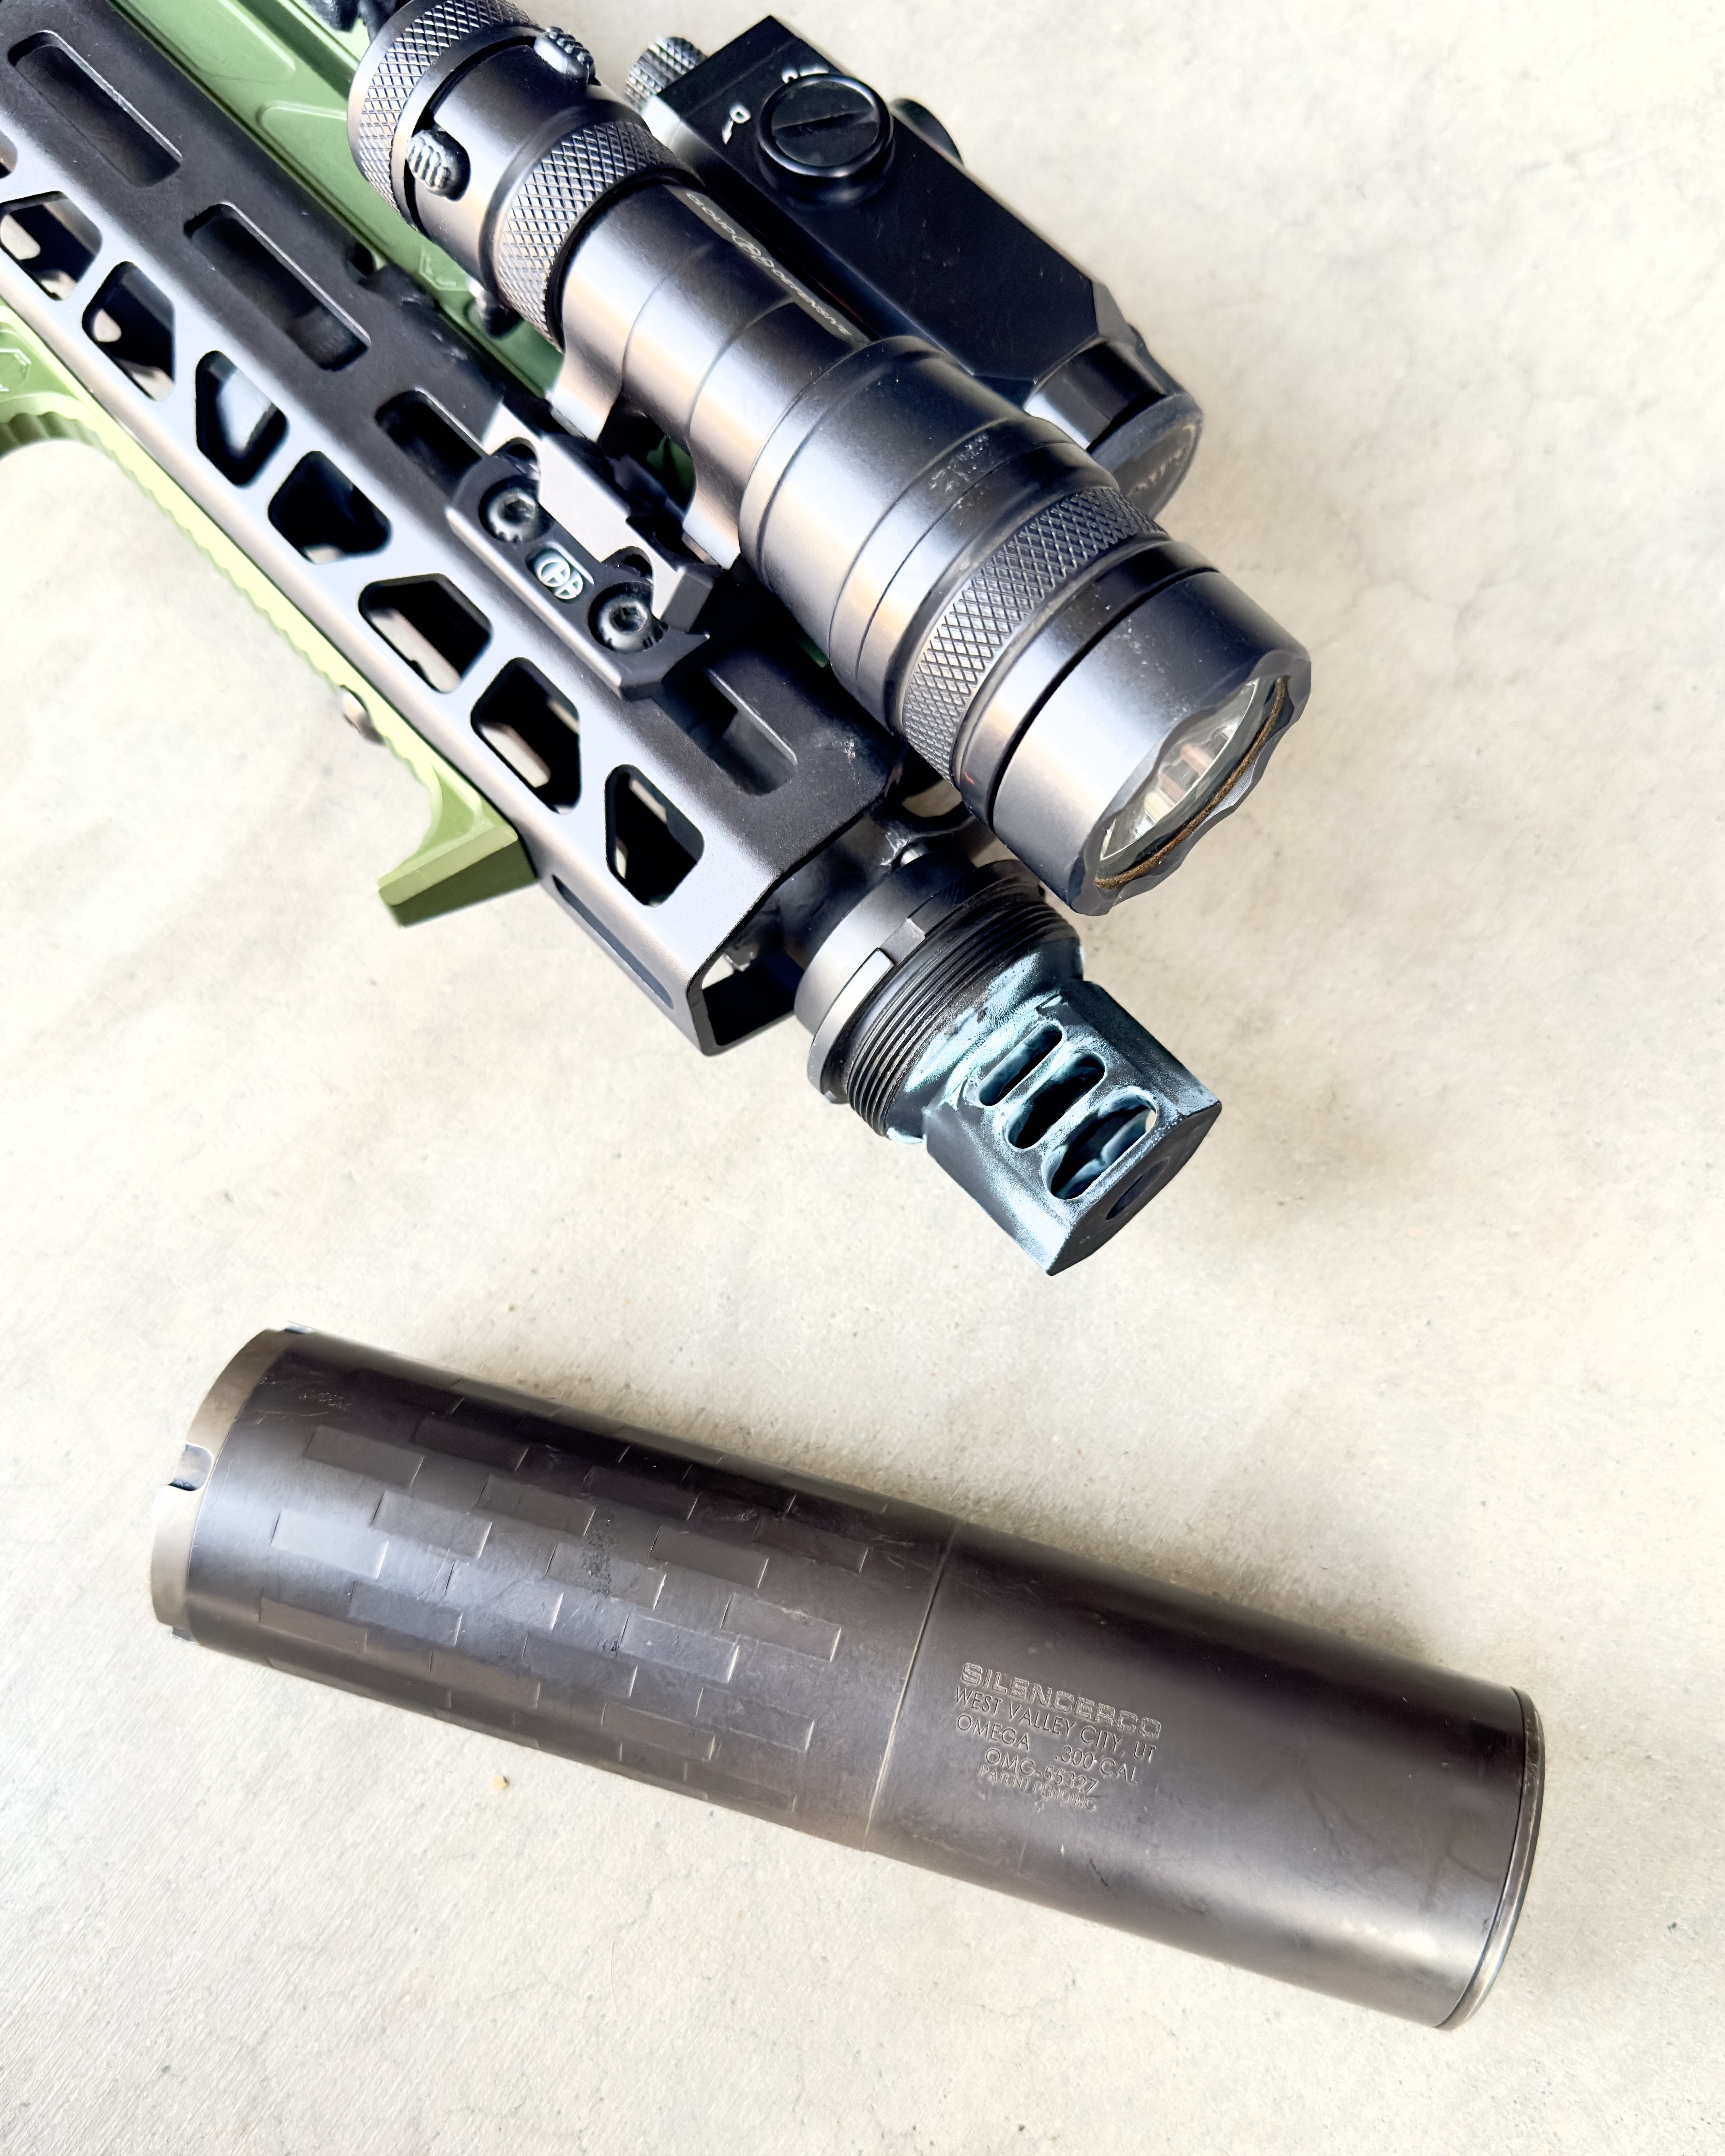
One last consideration is your muzzle device. In order to minimize your light signature, you’ll want to minimize the amount of flash from your muzzle which could be easily seen in low light or no-light situations. One way is to utilize a flash hider at the muzzle to reduce your flash signature. The downside to a flash hider is that it does not have very good recoil mitigation properties. A muzzle brake coule be used if it’s paired with a suppressor. A suppressor is the best way to minimize sound and flash sifnaturea. Ideally something with medium to large internal volume. It’s unlikely that a "K" or compact suppressor will mitigate flash effectively. The downside to suppressors is that they create additional back-pressure which could alter the function of your firearm if it’s not optimized for suppressor use. Also, there is a $200 tax stamp and wait required before you can get hands on. Another great option is a device such as the JMAC Flash Reduction Device (FRD). The FRD directly attaches to your muzzle threads and effectly illiminates or drastically decreases flash seen from the muzzle. This is a great option as it doesn’t require a wait, tax stamp, and double as your muzzle device.
So there you have it! The AK that you know and love, now optimized for night vision use. Day or night, light or dark, this firearm is capable of engaging targets regardless of the lighting conditions. For more information on the parts used for this project, see below for a full list. Be sure to check out the video below for additional examples and supplemental information.
Build List: (clickable links)
- Rifle: Arsenal SLR106CR
- Muzzle Device : RRD-360HD-24F-X37
- Handguard: 10.1” MMS
- Accessories: RC-QD, HRD-EXT
- Gas Tube: MMS GT-AKM
- Optic Mount: HG-OM-1913-5
- Grip: SPG-AK
- Stock Adapter: SM-4.5
- Stock: TS-9P w/ .25” Riser
- Optic: Promethean LP-1
- Laser Unit: LS321R (laser & illuminator)
- Light: Rein Micro
- Suppressor: Omega 300
Check out the video below for more!